For more than a decade, the architecture of e-commerce attribution on Shopify Plus rested on a single, permissive file: checkout.liquid, paired with the infamous "Additional Scripts" textarea in Shopify Admin. Developers could inject arbitrary JavaScript directly into the global DOM, read and write cookies synchronously via document.cookie, intercept form submissions on the main thread, and populate window.dataLayer with raw Liquid variables like {{ order.total_price | money_without_currency }}.
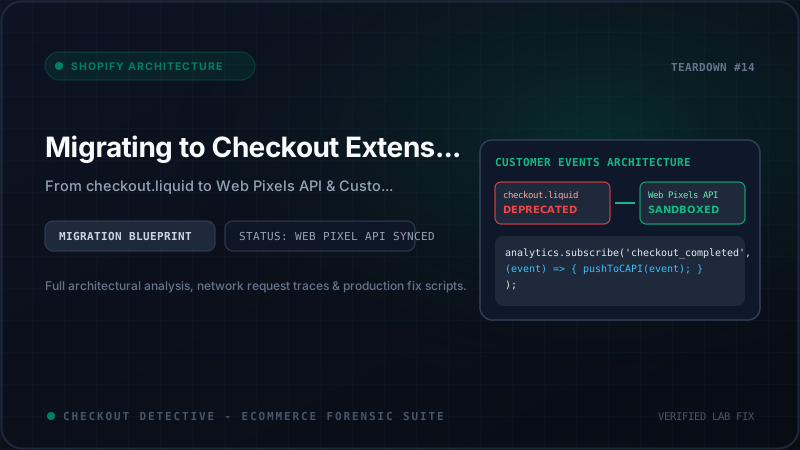
That era is officially over. As part of Shopify's complete architectural overhaul with Checkout Extensibility, access to checkout.liquid has been permanently retired for Information, Shipping, and Payment steps, and the deprecation clock on Thank You and Order Status pages is ticking down to zero. In its place stands the Customer Events Web Pixels API.
For storefront architects, performance engineers, and growth marketing teams, this is the single largest technical migration in Shopify's history. Done correctly, it isolates third-party tracking from the critical payment path, eliminates checkout-crashing race conditions, and dramatically improves page load times. Done incorrectly, it breaks Meta and TikTok conversion deduplication, blinds Google Analytics 4 to purchase events, strips affiliate network tracking IDs, and drops reporting on hundreds of thousands of dollars in post-purchase upsell revenue.
In this architectural guide, we walk through the engineering reality of Shopify's Customer Events sandbox, detail the exact event mapping mechanics, provide production-ready code for sandboxed GTM and Meta Pixel pipelines, and show you how to audit your telemetry with Checkout Detective.
The Architectural Shift: checkout.liquid vs. Customer Events Web Pixels
To understand why your legacy scripts fail when pasted into the new environment, you must understand the underlying runtime model. Legacy scripts executed directly in the main browser thread alongside Shopify's core checkout checkout engine. A poorly written third-party script from an affiliate vendor could block DOM parsing, peg the CPU at 100%, and literally freeze the "Complete Order" button.
Shopify resolved this by decoupling analytics from the user interface using an asynchronous event-driven sandbox:
=== LEGACY ARCHITECTURE (checkout.liquid / Additional Scripts) ===
[ Main Browser Window (DOM Thread) ]
   ├── Shopify Core Checkout UI
   ├── window.dataLayer = [...]
   ├── document.cookie = "..."
   ├── Direct 3rd-Party Scripts (GTM, Meta, TikTok, CJ, Rakuten)
   └── [VULNERABILITY]: Scripts could intercept form inputs, read PII, or crash checkout

=== MODERN ARCHITECTURE (Checkout Extensibility & Customer Events) ===
[ Main Browser Window (DOM Thread) ]
   ├── Shopify Native Checkout Engine (Strict CSP, Zero Third-Party DOM Access)
   │     │
   │     └── [Event Dispatcher] (Pub/Sub Event Bus)
   │               │
   │               ▼ (PostMessage / Worker Communication)
[ Sandboxed Web Worker / Iframe Context ]
   ├── analytics.subscribe('checkout_completed', callback)
   ├── Isolated global scope (No window.document, No direct DOM)
   ├── Controlled browser Storage API (browser.cookie, browser.localStorage)
   └── Sandboxed Analytics Payloads ──▶ Network Beacon to Ads & Analytics Endpoints
In the Customer Events runtime, your tracking code does not touch the checkout DOM. Instead, Shopify's internal checkout state machine emits structured event payloads over a message bridge to an isolated environment. Your pixel code subscribes to these events asynchronously.
Understanding the Sandbox Security Constraints
The sandboxed execution environment enforces strict security boundaries designed to protect buyer privacy and prevent checkout tampering:
| Capability / API | Legacy checkout.liquid | Web Pixels API Sandbox | Technical Impact & Alternative |
|---|---|---|---|
| window / document | Full Global Access | Blocked (Throws Error) | Cannot query selectors or modify elements. Must rely solely on event payloads. |
| document.cookie | Synchronous Read/Write | Blocked | Must use asynchronous browser.cookie.get() and browser.cookie.set(). |
| localStorage | Synchronous LocalStorage | Namespaced Storage | Must use asynchronous browser.localStorage.getItem(). Cannot read main domain keys. |
| DOM Script Injection | <script src="..."> |
Restricted / Blocked | External scripts cannot be injected into the main document. HTTP fetch must be used. |
| Customer PII Access | Unrestricted | Consent & Privacy Gated | Customer emails, phones, and addresses are redacted unless buyer grants tracking consent. |
If your legacy tracking code contains lines like var email = document.getElementById('checkout_email').value; or document.cookie = "_my_tag=1";, running that script in Customer Events will throw fatal runtime exceptions and fail silently.
The Two Types of Pixels: App Pixels vs. Custom Pixels
When migrating to Customer Events, Shopify provides two integration routes:
- App Pixels: Packaged by third-party apps installed via the Shopify App Store (for example, the official Google & YouTube App, Meta Facebook & Instagram App, or TikTok App). They are configured via app settings and managed by the app's backend. They run automatically without manual code manipulation.
- Custom Pixels: Authored directly inside Shopify Admin → Settings → Customer Events. This is where enterprise brands and technical teams write custom JavaScript to connect Google Tag Manager, custom data warehouses, server-side attribution endpoints, affiliate networks, and proprietary tracking pipelines.
Do not run an App Pixel and a Custom Pixel for the same advertising network simultaneously without strict deduplication. For instance, if you have the official Meta App installed AND you write a Custom Pixel firing Meta's Purchase event, Meta will record double conversions unless both events transmit identical event_id strings within 48 hours. Generate and verify your CAPI match keys with our Meta CAPI Generator Tool before deploying.
Anatomy of the Customer Events Lifecycle
Shopify provides a standardized taxonomy of lifecycle events across the storefront and checkout funnels. Your Custom Pixel subscribes to these events via the global analytics.subscribe() API:
page_viewed: Triggered on every page navigation.product_viewed: Triggered on product detail pages.product_added_to_cart: Triggered when a shopper adds an item.checkout_started: Fired on the first step of checkout.checkout_contact_info_submitted: Fired when email/phone is validated.checkout_shipping_info_submitted: Fired when shipping method is selected.payment_info_submitted: Fired when credit card or payment authorization begins.checkout_completed: The critical conversion event, fired when payment succeeds.
The Standard Payload Structure of checkout_completed
When checkout_completed triggers, Shopify passes an immutable event object containing complete transaction data:
// The structure of the Shopify checkout_completed event payload
{
  id: "sh-evt-94a82b-4291-...",
  name: "checkout_completed",
  timestamp: "2026-09-20T14:32:10.124Z",
  type: "standard",
  context: {
    document: {
      location: { href: "https://shop.brand.com/checkouts/cn/c1-..." },
      referrer: "https://shop.brand.com/cart",
      title: "Checkout - Brand Store"
    },
    navigator: {
      userAgent: "Mozilla/5.0 (Macintosh; Intel Mac OS X 10_15_7)...",
      language: "en-US"
    },
    window: {
      innerWidth: 1440,
      innerHeight: 900
    }
  },
  data: {
    checkout: {
      token: "c1-948192a0194829104",
      order: {
        id: "5829104829104",
        customer: {
          id: "691829401",
          email: "customer@example.com",
          firstName: "Jane",
          lastName: "Doe",
          phone: "+15551234567"
        }
      },
      currencyCode: "USD",
      subtotalPrice: { amount: 120.00, currencyCode: "USD" },
      totalTax: { amount: 9.60, currencyCode: "USD" },
      totalPrice: { amount: 139.60, currencyCode: "USD" },
      shippingLine: {
        price: { amount: 10.00, currencyCode: "USD" }
      },
      discountApplications: [
        { title: "AUTUMN20", value: { percentage: 20 } }
      ],
      lineItems: [
        {
          id: "line-item-1",
          quantity: 2,
          title: "Merino Wool Crewneck - Navy / L",
          variant: {
            id: "41928301928",
            title: "Navy / L",
            price: { amount: 60.00, currencyCode: "USD" },
            sku: "MWC-NAV-L",
            product: {
              id: "710928301",
              title: "Merino Wool Crewneck",
              vendor: "Brand Studio",
              type: "Apparel"
            }
          }
        }
      ]
    }
  }
}
Production Implementation: Sandboxed Google Tag Manager (GTM) Container
Because Google Tag Manager requires a DOM script injection to mount its traditional container, running GTM inside a Custom Pixel requires creating a bridge that passes events from the sandbox into a sandboxed GTM frame or executing a tag container directly in the Web Pixel environment.
Here is the production-grade, battle-tested Custom Pixel script used by leading Shopify Plus brands. It initializes a dataLayer array, loads GTM within the sandboxed environment, subscribes to key funnel events, and translates Shopify's schema into the exact GA4 standard e-commerce specification:
// =========================================================================
// Shopify Custom Pixel: Production GA4 / GTM DataLayer Pipeline
// Settings -> Customer Events -> Add custom pixel -> "GTM Sandboxed Engine"
// =========================================================================

const GTM_CONTAINER_ID = 'GTM-XXXXXXX';

// 1. Initialize dataLayer inside sandboxed environment
window.dataLayer = window.dataLayer || [];

function gtag() {
  window.dataLayer.push(arguments);
}

// 2. Load the GTM container script inside the sandbox iframe
(function(w, d, s, l, i) {
  w[l] = w[l] || [];
  w[l].push({ 'gtm.start': new Date().getTime(), event: 'gtm.js' });
  var f = d.getElementsByTagName(s)[0],
      j = d.createElement(s),
      dl = l != 'dataLayer' ? '&l=' + l : '';
  j.async = true;
  j.src = 'https://www.googletagmanager.com/gtm.js?id=' + i + dl;
  f.parentNode.insertBefore(j, f);
})(window, document, 'script', 'dataLayer', GTM_CONTAINER_ID);

// 3. Helper: Map Shopify line items to GA4 e-commerce item format
function formatLineItems(lineItems) {
  if (!Array.isArray(lineItems)) return [];
  return lineItems.map((item, index) => ({
    item_id: item.variant?.sku || String(item.variant?.id || item.id),
    item_name: item.title || item.variant?.product?.title || '',
    affiliation: 'Online Store',
    coupon: '',
    discount: 0,
    index: index + 1,
    item_brand: item.variant?.product?.vendor || '',
    item_category: item.variant?.product?.type || '',
    item_variant: item.variant?.title || '',
    price: Number(item.variant?.price?.amount || 0),
    quantity: Number(item.quantity || 1)
  }));
}

// 4. Subscribe to checkout_started (GA4 begin_checkout)
analytics.subscribe('checkout_started', async (event) => {
  const checkout = event.data?.checkout;
  if (!checkout) return;

  window.dataLayer.push({ ecommerce: null }); // Clear previous ecommerce object
  window.dataLayer.push({
    event: 'begin_checkout',
    ecommerce: {
      currency: checkout.currencyCode,
      value: Number(checkout.totalPrice?.amount || 0),
      items: formatLineItems(checkout.lineItems)
    }
  });
});

// 5. Subscribe to payment_info_submitted (GA4 add_payment_info)
analytics.subscribe('payment_info_submitted', async (event) => {
  const checkout = event.data?.checkout;
  if (!checkout) return;

  window.dataLayer.push({ ecommerce: null });
  window.dataLayer.push({
    event: 'add_payment_info',
    ecommerce: {
      currency: checkout.currencyCode,
      value: Number(checkout.totalPrice?.amount || 0),
      payment_type: 'Shopify Payment Gateway',
      items: formatLineItems(checkout.lineItems)
    }
  });
});

// 6. Subscribe to checkout_completed (GA4 purchase conversion)
analytics.subscribe('checkout_completed', async (event) => {
  const checkout = event.data?.checkout;
  if (!checkout) return;

  // Retrieve first-party cookies asynchronously via Web Pixels Storage API
  const gaCookie = await browser.cookie.get('_ga');
  const fbpCookie = await browser.cookie.get('_fbp');

  const orderId = checkout.order?.id || checkout.token;
  const transactionId = checkout.order?.name || orderId;

  window.dataLayer.push({ ecommerce: null });
  window.dataLayer.push({
    event: 'purchase',
    ecommerce: {
      transaction_id: String(transactionId),
      value: Number(checkout.totalPrice?.amount || 0),
      tax: Number(checkout.totalTax?.amount || 0),
      shipping: Number(checkout.shippingLine?.price?.amount || 0),
      currency: checkout.currencyCode,
      coupon: checkout.discountApplications?.[0]?.title || '',
      items: formatLineItems(checkout.lineItems)
    },
    user_data: {
      ga_client_id: gaCookie || '',
      fbp: fbpCookie || ''
    }
  });
});
The Post-Purchase Upsell Trap
One of the most dangerous blind spots during Checkout Extensibility migrations involves post-purchase upsell applications (such as ReConvert, Zipify OneClickUpsell, or CartHook).
Under Shopify's order processing lifecycle:
1. Customer enters payment info and clicks "Pay Now".
2. Primary transaction authorizes successfully.
3. Shopify triggers checkout_completed IMMEDIATELY.
4. Before showing the Thank You page, Shopify intercepts the flow and renders the Post-Purchase Upsell Page.
5. The customer clicks "Add to Order (1-Click Upsell)" for an additional $45 item.
6. Shopify appends the new line item to the order and charges the customer's vault token.
7. The customer is finally redirected to the Thank You page.
Notice the critical timing hazard: checkout_completed already fired at step 3!
If your analytics pipeline only listens to checkout_completed, your reported purchase revenue in GA4 and Meta Ads will omit the $45 upsell entirely. Over a month of high-volume sales, your advertising dashboards will underreport true ROAS by 10% to 25%.
How to Handle Post-Purchase Upsells Accurately
To capture 100% of order value without underreporting or double-counting, implement this hybrid strategy:
-
Server-Side CAPI via Order Webhooks: Rather than relying solely on client-side browser pixels for purchase attribution, dispatch your primary Meta CAPI and GA4 Measurement Protocol purchases from a server webhook listening to
orders/updatedororders/paidwith a 5-minute debounce window. This guarantees that all post-purchase upsells, order edits, and discount adjustments are included in the final transactional total. -
Deduplicate Client-Side via Deterministic Event IDs: If your client-side Custom Pixel fires on
checkout_completed, attach anevent_idderived deterministically from the Shopify Order ID:shopify_purchase_{order_id}. When your server-side webhook fires 5 minutes later with the updated revenue, Meta merges the two payloads based on that matching ID. -
Listen to Custom Post-Purchase Events: If your upsell app dispatches custom browser events via the Web Pixels API, subscribe to
analytics.subscribe('custom_pixel_event_name', ...)and emit a secondaryPurchaseUpsellcustom conversion event.
Migrating Affiliate Pixels & Ad Networks (TikTok, Pinterest, Impact, CJ)
In legacy checkout.liquid, affiliate networks like Impact, Rakuten, Commission Junction (CJ), and ShareASale instructed merchants to paste <iframe> or <img> tracking tags into Additional Scripts:
<!-- DEPRECATED: Legacy checkout.liquid 1x1 image pixel -->
<img src="https://track.affiliate-network.com/track.php?order_id={{ order.order_number }}&amount={{ subtotal_price | money_without_currency }}" width="1" height="1" />
In the Customer Events sandbox, direct HTML injection is impossible. You cannot append <img> or <iframe> tags to the checkout page.
Instead, you must translate the affiliate beacon into a direct asynchronous fetch() request inside your Custom Pixel:
// Modern Sandboxed Affiliate Network Dispatch inside Custom Pixel
analytics.subscribe('checkout_completed', async (event) => {
  const checkout = event.data?.checkout;
  if (!checkout) return;

  // Read stored affiliate click ID from browser.localStorage
  const affiliateClickId = await browser.localStorage.getItem('affiliate_click_id');
  if (!affiliateClickId) return;

  const orderId = checkout.order?.id || checkout.token;
  const subtotal = checkout.subtotalPrice?.amount || 0;
  const currency = checkout.currencyCode || 'USD';

  // Construct query parameters for server beacon
  const endpoint = new URL('https://track.affiliate-network.com/track.php');
  endpoint.searchParams.set('click_id', affiliateClickId);
  endpoint.searchParams.set('order_id', String(orderId));
  endpoint.searchParams.set('amount', String(subtotal));
  endpoint.searchParams.set('currency', currency);

  // Dispatch asynchronous beacon request
  try {
    await fetch(endpoint.toString(), {
      method: 'GET',
      mode: 'no-cors', // Affiliate tracking endpoints frequently use no-cors
      keepalive: true  // Guarantees delivery even if user closes tab
    });
  } catch (err) {
    // Graceful error capture
  }
});
Pre-Flight Migration Verification Checklist
Before deactivating your legacy checkout.liquid scripts or retiring Additional Scripts, run through this verification protocol:
| Audit Checkpoint | Verification Method | Target State |
|---|---|---|
| 1. Zero Global DOM Reliance | Search custom code for document. or window.location. |
No unhandled ReferenceErrors in worker console. |
| 2. Asynchronous Cookie Retrieval | Verify all cookie reads use await browser.cookie.get(). |
First-party cookies (_ga, _fbp) populate correctly. |
| 3. Purchase Deduplication ID Parity | Compare client event_id vs server CAPI event_id. |
100% character-for-character match on order ID. |
| 4. GA4 Transaction Id Matching | Check GA4 DebugView for incoming purchase events. |
Items, value, and transaction_id present and non-empty. |
| 5. Post-Purchase Reconciliation | Complete a test order with a 1-click upsell accepted. | Total revenue matches Shopify Admin final order amount. |
Auditing Telemetry with Checkout Detective
Migrating to the Web Pixels API should never be done blindly. To verify that your events are firing in real time, launch the Checkout Detective Diagnostic Engine on your store:
- Open your checkout page in Google Chrome and activate the Checkout Detective side panel.
- Switch to the "Pixel Detective" tab to view every live beacon emitted across the Web Pixel worker bridge.
- Inspect the Deduplication Status: verify that
Purchaseevents display valid matching IDs without duplicate browser fires. - Before signing off on staging or production, cross-reference your configuration against our interactive Pre-Flight Checkout Testing Checklist.
Summary: Elevating Your Storefront's Attribution Standard
The deprecation of checkout.liquid and Additional Scripts is not a setback; it is an architectural upgrade. By moving tracking logic into the sandboxed Customer Events environment, you protect your checkout performance from script bloat, eliminate third-party security vulnerabilities, and establish a clean, deterministic telemetry pipeline.
Take the time to structure your Custom Pixels with defensive error handling, deterministic event IDs, and accurate GA4 schema mapping. Your marketing attribution, ad bidding models, and checkout conversion rates will reflect the difference.
Audit your Customer Events setup today
Verify whether your sandboxed Custom Pixels, Meta CAPI keys, and GA4 e-commerce events are firing with complete data integrity.
Launch Meta CAPI Match Key Generator